A step by step tutorial on how to record the oral history interview over Zoom.
Choose the method of recording – Before the recording:
- We will use Zoom https://ucsd.zoom.us/ . Make sure you are logged into your UCSD Zoom account.
- You should start the meeting as the host and should practice setting up a meeting, sending out the invitation (with phone number), AND practice recording ahead of time, so you know how to save the file.
- Ask if the interviewee prefers to be recorded with video, audio or call via phone if they do not have access to a stable and strong internet connection or a computer.
- NOTE: There are two ways to record a meeting over Zoom – Locally or to the Cloud. Selecting to record to the Cloud will provide you with an interview transcription. Check to see if Cloud recording is enabled.
How to record a meeting/the oral history interview over Zoom (to the cloud)
NOTE: There are two ways to record a meeting over Zoom – Locally or to the Cloud. Selecting to record to the Cloud can provide you with an interview transcription.
Before starting the oral history interview make sure you are the host of the Zoom meeting. Look towards the bottom of the Zoom screen/window, select the “Record” button and select the “Record to the Cloud” option to ensure that the recording saves to your account.

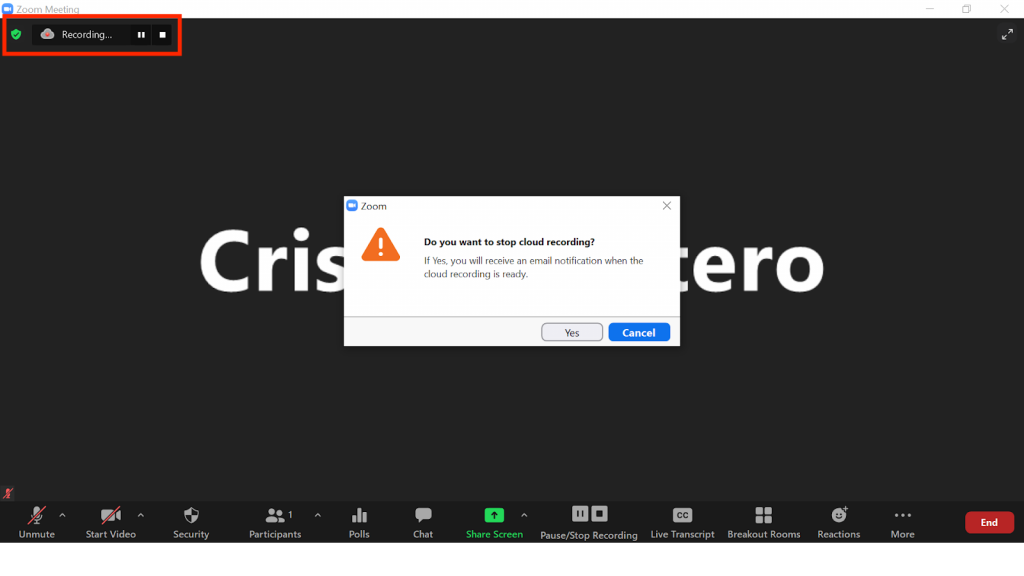
To ensure that you are recording to the cloud, you should see an icon in the upper left hand corner that reads “Recording…” otherwise, you should click on the record button and select the “Record to the Cloud” option.
Note: While you are recording, allow for any pauses in the interview if needed. Any long pauses or breaks can be edited out once the recording has finished processing.
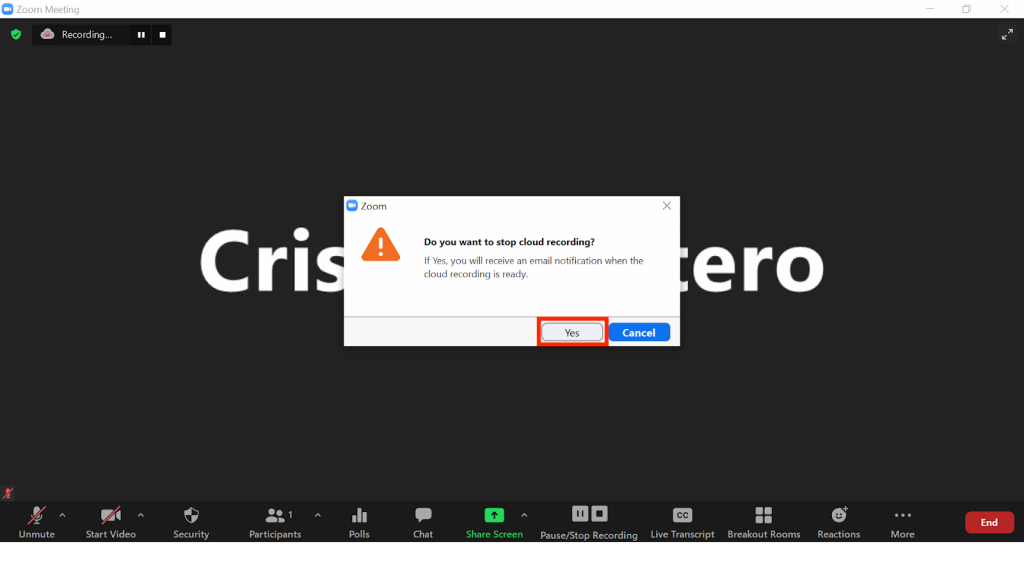
Once the interview is complete, select the “Stop Recording” button and you should see a screen that reads “Do you want to stop cloud recording.” Select “Yes.” This will stop the recording.

Once you end the recording, the recording needs to be processed. Once this is complete, Zoom will send the host an email with two links.

The first link is for the host to manage the recording. Clicking on this link should lead you to your Zoom account. Here you can download the video recording of the meeting and you can also download an audio transcript if available.
Once you have clicked the link and are on your Zoom account, click on “Download.” To download the audio transcript, hover over “Audio Transcript” and click on the downward arrow to download.

NOTE: You may see a “Transcribing…” message next to “Audio Transcript”. The transcription part of the recording may take some additional time to process (about 1-2 days) and you should receive an email once it is available.
NOTE: Zoom will delete your files after 30 days so it is best to download and make a copy of the recording as soon as possible.
The second link is for you to share with the interviewee and will include a passcode for them to view the recording.
- The interviewee will need to be logged into their Zoom account to view the recording and will need the passcode provided in the email that was sent to you (the host).
- An alternative to this is to download the recorded interview and send the recording to your interviewee via email.
You will receive an email once your audio transcription is available. The email includes two links. The first is for you (the host) to manage and download the recording. The second link contains the audio recording along with an integrated transcription.

The zoom transcription may not accurately transcribe all of the audio so you will need to review the text and revise, as needed. Use this tutorial as a guide for the transcription process.
Important Notes:
- Zoom will delete your files after 30 days so it is best to download and make a copy of the recording as soon as possible.
- The transcription part of the recording may take some additional time to process (about 1-2 days) and you should receive an email once it is available.
Once you have both the recording and the edited transcription, you should send both of these items to your interviewee for approval before publishing to the website.
How to Enable Cloud Recording
- Log into ucsd.zoom.us/signin.
- Go to settings on the side bar and select the “Recording” tab near the top of the page.
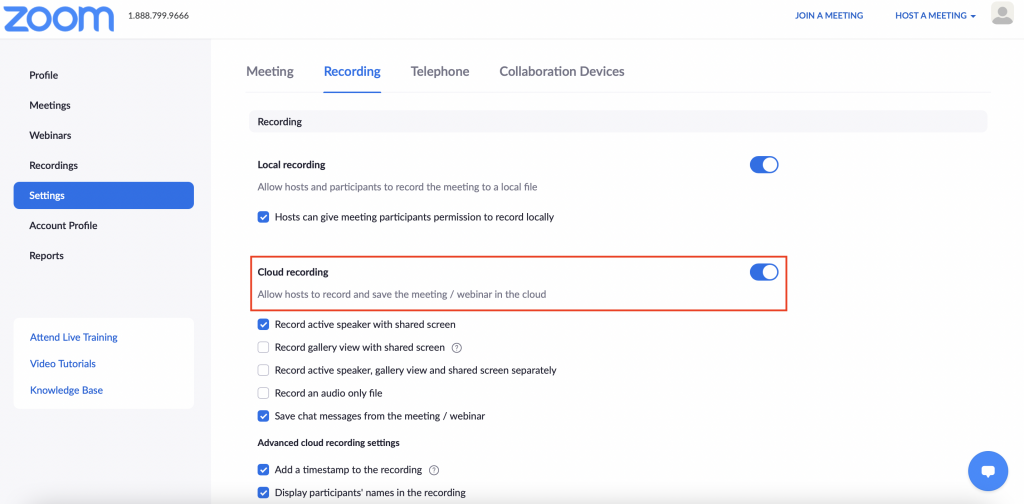
- Select the slider button next to “Cloud Recording” to ensure that it is on. It should turn blue once it is on.
- Scroll down and select “allow cloud recording sharing” and “require passcode to access shared cloud recordings.”